Prerequisites
- Raspberry Pi (any model with network connectivity)
- MicroSD card (8GB minimum, 16GB recommended)
- Power supply for your Pi
- Ethernet cable or WiFi connection
- Computer to set up the SD card
Part 1: Initial Raspberry Pi Setup
Step 1: Install Raspberry Pi OS
- Download Raspberry Pi Imager from raspberrypi.com/software
- Insert microSD card into your computer
- Open Raspberry Pi Imager:
- Choose Device: Your Raspberry Pi model
- Choose OS: Raspberry Pi OS Lite (64-bit) (headless, no desktop)
- Choose Storage: Your microSD card
- Click the gear icon (⚙️) to enable advanced options:
- Set hostname:
pihole - Enable SSH
- Set username and password
- Configure WiFi (if using wireless)
- Set hostname:
- Click “Write” and wait for completion
Step 2: First Boot & Update
- Insert SD card into Raspberry Pi and power it on
- Connect via SSH from your computer:
ssh pi@[ip address]
# Default password: whatever you set in Imager
- Update system packages:
sudo apt update
sudo apt upgrade -y
sudo apt autoremove -y
Part 2: Installing Pi-hole
Step 1: Download and Run Installer
curl -sSL https://install.pi-hole.net | bash
Note: You can also download and review the script first:
wget -O basic-install.sh https://install.pi-hole.net
sudo bash basic-install.sh
Step 2: Installation Process Walkthrough
During installation, you’ll encounter several prompts:
- Upstream DNS Provider – Choose from list (Google, Cloudflare, OpenDNS, etc.)
- Recommendation: Cloudflare (1.1.1.1) or Quad9 (9.9.9.9)
- Block Lists – Default lists are good to start with
- Protocols – Choose both IPv4 and IPv6 (if your network supports it)
- Static IP – IMPORTANT: Set static IP for your Pi
- Choose “Yes” to set static IP via DHCP reservation (recommended)
- Or configure manually later
- Web Interface – Choose “On”
- Select lighttpd as web server
- Query Logging – Choose “On” (you can disable later)
- Privacy Mode – Choose based on your preference
Step 3: Note Your Admin Password
At the end of installation, you’ll see:
Admin webpage: http://[ip address]/admin
Password: [random password]
Save this password! You can also view it later:
sudo pihole -a -p
Part 3: Post-Installation Configuration
Step 1: Access Web Interface
Open a browser on any device on your network:
http://[ip address]/admin
Step 2: Change Admin Password (Optional)
sudo pihole -a -p
Step 3: Configure DHCP (Optional but Recommended)
If you want Pi-hole to handle DHCP:
- Disable DHCP on your router first
- In Pi-hole web interface:
- Settings → DHCP
- Enable DHCP server
- Configure range (e.g., 192.168.1.100-192.168.1.200)
- Set router/gateway/DNS to your Pi’s IP
Step 4: Update Block Lists
# Update gravity (block lists)
pihole -g

# Or via web interface: Tools → Update Gravity
Part 4: Router Configuration
Option A: Set Pi-hole as DNS Server on Router (Recommended)
- Access your router admin page (usually 192.168.1.1 or 192.168.0.1)
- Find DNS settings (often under Internet/WAN settings)
- Set primary DNS to your Pi-hole IP address
- Set secondary DNS to your Pi-hole IP or leave blank
- Save and reboot router
Option B: Configure Individual Devices
Set DNS server manually on each device to your Pi-hole IP address.
Part 5: Testing & Verification
Test 1: Check Pi-hole is Working
# On your Pi
pihole status
Test 2: Verify DNS Resolution
From any computer on your network:
nslookup example.com
# Should show your Pi-hole IP as server
Test 3: Check Blocking
Visit an ad-heavy site or test with:
curl -I http://doubleclick.net
# Should be blocked
Part 6: Additional Configuration
Update Pi-hole Regularly
# Update Pi-hole core
pihole -up

# Update everything
sudo apt update && sudo apt upgrade
Add Custom Block Lists
In web interface:
- Group Management → Adlists
- Add additional lists like:
Whitelist/Blacklist Domains
# Whitelist a domain
pihole -w example.com

# Blacklist a domain
pihole -b example.com

# Or use web interface: Tools → Whiitelist/Blacklist
Enable DHCP (if not done during setup)
sudo pihole -a enabledhcp "192.168.1.100" "192.168.1.200" "24"
Part 7: Troubleshooting
Common Issues:
1. Pi-hole not blocking ads:
# Check status
pihole status
# Check queries
pihole tail
2. Devices not using Pi-hole:
- Check router DNS settings
- Flush DNS on devices:
# Windows
ipconfig /flushdns
# macOS/Linux
sudo systemd-resolve --flush-caches
3. Can’t access web interface:
# Restart web server
sudo service lighttpd restart
# Check if Pi-hole is running
pihole status
4. Update issues:
# Repair Pi-hole
pihole -r
Part 8: Monitoring & Maintenance
Useful Commands:
# View real-time queries
pihole tail

# Get summary
pihole -c

# Check version
pihole -v

# Disable for x seconds (for troubleshooting)
pihole disable 30s

# Update everything
pihole -up
Schedule Regular Updates:
Add to crontab:
sudo crontab -e
# Add these lines:
0 2 * * * pihole -up
0 3 * * * pihole -g
Part 9: Security Considerations
- Change default SSH password
- Keep system updated:
sudo apt update && sudo apt upgrade -y
- Consider firewall (optional):
sudo apt install ufw
sudo ufw allow ssh
sudo ufw allow http
sudo ufw allow dns
sudo ufw enable
- Regularly check logs:
pihole -t
Pro Tips
- Backup your configuration:
# Backup
pihole -a teleporter pihole-backup.tar.gz
# Restore
pihole -a teleporter pihole-backup.tar.gz
- Use Conditional Forwarding (if devices show as clients):
- Web interface → Settings → DNS
- Enable “Use conditional forwarding”
- Enter your local network details
- Set up VPN to use Pi-hole remotely
- Monitor with Grafana (advanced):
- Pi-hole has built-in API for monitoring
Resources
- Official Documentation: docs.pi-hole.net
- Community Forum: discourse.pi-hole.net
- GitHub: github.com/pi-hole
- Reddit: r/pihole
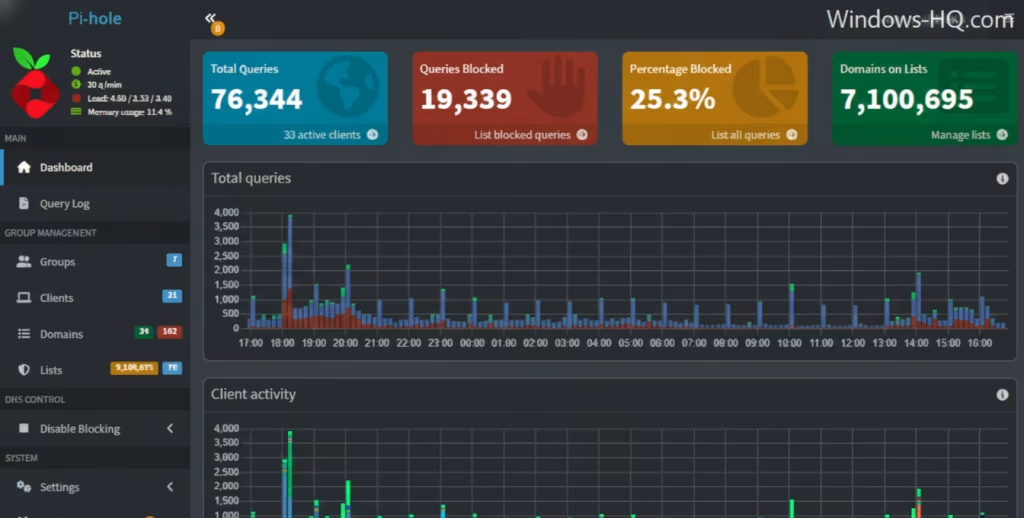
Congratulations! Your Pi-hole is now running and blocking ads network-wide. The dashboard at http://[ip address]/admin will show stats on blocked queries and overall network activity.
First Week Checklist:
- Verify all devices are using Pi-hole
- Check if any sites break (add to whitelist if needed)
- Monitor dashboard for unusual activity
- Set up regular update schedule
Remember to check the Pi-hole admin panel regularly to monitor its performance and make adjustments as needed!